


|
StableBit DrivePool 1.X
A state of the art disk pooling application with file duplication.
|
Quick Start
(Build 6102)

StableBit DrivePool is a disk pooling application that combines multiple physical drives into one virtual drive and provides file duplication in duplicated folders.
This section will walk you thorough the basic steps of setting up StableBit DrivePool for the first time.
StableBit DrivePool is administered from the Dashboard, so open the Dashboard to begin.
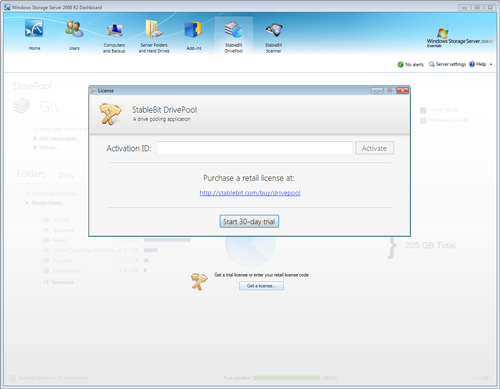
If this is the first time that you're starting StableBit DrivePool, you will need to get a license to use it.
Getting a license is quick and easy. You can either purchase a retail license or start a 30-day trial.
 |
If your server is not connected to the Internet, clicking the Activate button or getting a trial will offer you an alternate activation method. |
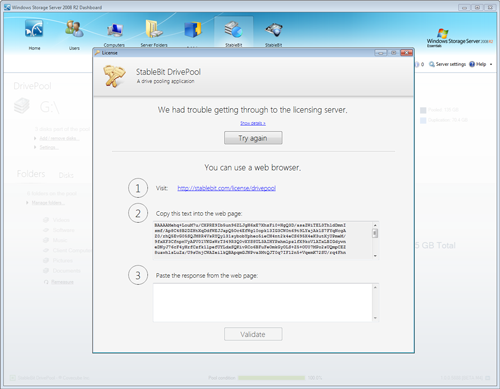
To complete web based licensing, go to a computer with Internet access, visit the web site indicated on the licensing screen, copy and paste the long block of text into the site, click Validate on the web site. The web site will come back with another long block of text that you should copy from the web site into the licensing screen of the application. Now click Validate in the application.
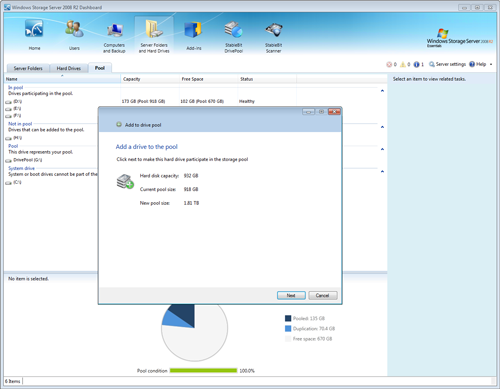
To add a hard drive to the pool, switch to the Pool tab, select the drive that you wish to add and click Add drive to the pool.
This hard drive will now be able to store files placed on the pool.
|
Adding a hard drive that is already formatted will not alter its existing contents. Adding an unformatted drive to the pool will format it and add it to the pool. |
|
Only local NTFS formatted simple volumes can be added to the pool. Dynamic volumes cannot participate in the pool. |
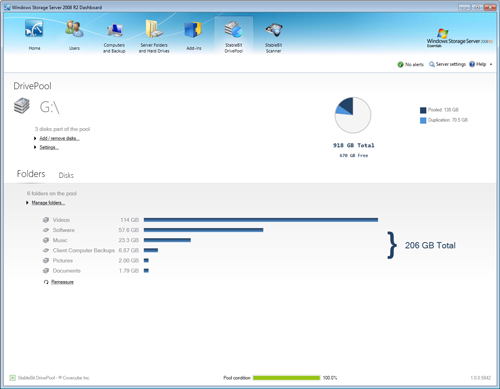
The pool is a virtual drive on the server. The pool drive letter can be seen on the DrivePool tab.
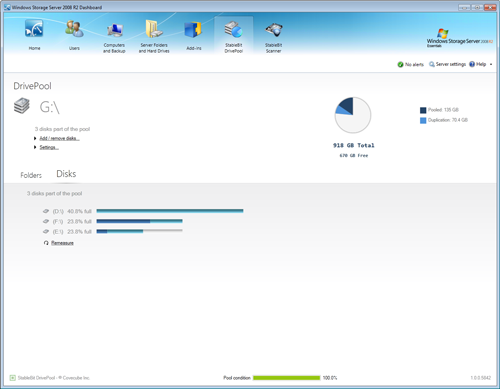
The pool drive letter will be different on every computer. In the screenshot above it's G:\.
The next thing to do is move one or more existing folders onto the pool. You can do this from the Folders tab. Select a folder and click Move the folder. Then select the pool drive letter as the destination.
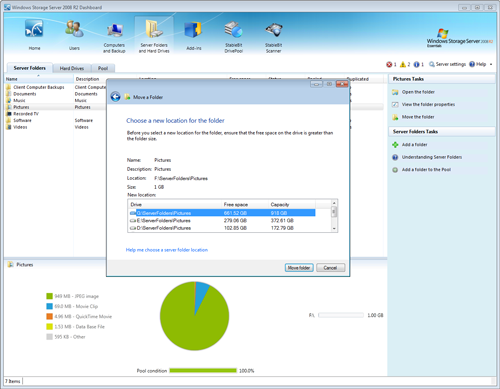
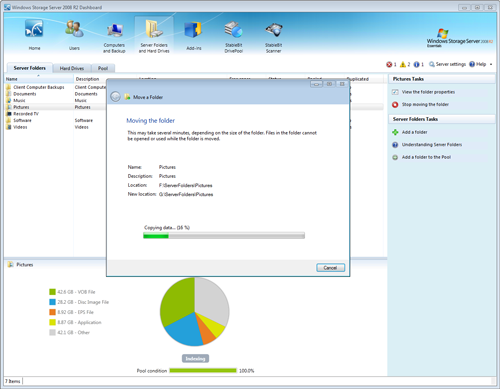
All the files in that folder will be moved over to the pool. The process can take a while if you have a lot of files in that folder.
|
You will get a warning after the move completes that Shadow Copies were not enabled. This is because volume shadow copies are not supported on the pool, so this is expected. |
You can also add new folders to the pool by clicking Add a folder to the pool.
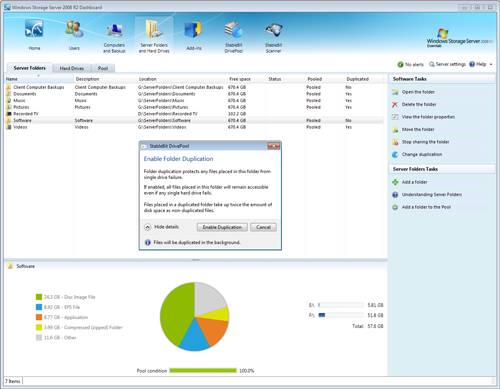
You can enable folder duplication for any folder on the pool, as long as your pool consists of at least 2 physical hard drives.
|
You can continue to use the server normally as existing files are duplicated in the background. You can even safely shut down the server while duplication is in progress. |